This afternoon I dragged my brother out of the house on his day off to help me with an experiment. You may notice his collar turned up in the following pictures, that’s to keep out the rain that decided to suddenly descend on us when we got to the woods, and then the sleet that followed. He didn’t run away. Have I mentioned how lucky I am to have a brother who’s such a good sport? Very lucky!
Anyway. Today’s experiment was about properly understanding focal length. Not the science behind it, that’s for someone a little more technically minded (I bet my brother could explain it to me after a few minutes of research), but rather about the effect our focal length choices have on the images we take.
I’m aware that I love the look of certain lenses (my beloved 85mm 1.8 for example), while others just don’t inspire me so much, but I’ve never shot with each lens in turn to really understand what they do to the scene in front of me.
For this experiment I set up the camera on a tripod so it would remain at an even height throughout and I asked my brother to stand in one spot without moving an inch. As well as the angle of field, I wanted to demonstrate the effect that focal length has on depth of field, in other words the way the background softens with longer focal lengths, so I set the camera to stay at f/5.6 no matter which lens I was using. In this way the background would only be affected by the focal length and not the more usual method of changing the aperture. The only exposure setting I adjusted while shooting was the shutter speed to work with the light when it changed slightly due to the sun.
Before I show you the pictures it’s worth mentioning that I’m shooting on a Canon 550D with a multiplier of about 1.6, so technically all these focal lengths are the equivalent of slightly higher than I’ve labeled them (30mm becomes 48mm, 85mm becomes 136mm etc) and the same lenses on another body may look a little different, but the relative difference between each focal length remains exactly the same.
With each focal length change I had to take a step or two back to keep the composition as similar as possible. And this is what I got…
18-55mm kit lens :
:
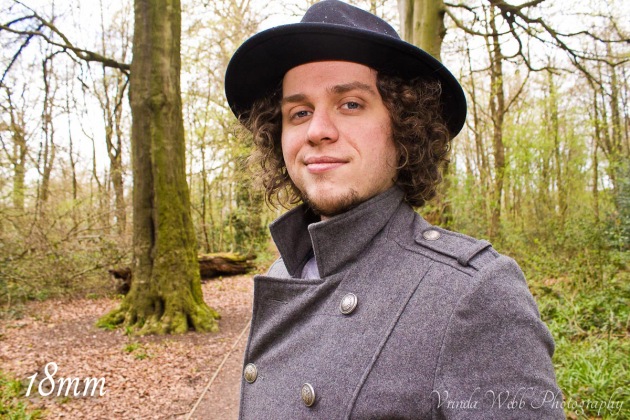
(Photo taken at: 1/320, f/5.6, ISO 800)
Sigma 30mm 1.4:
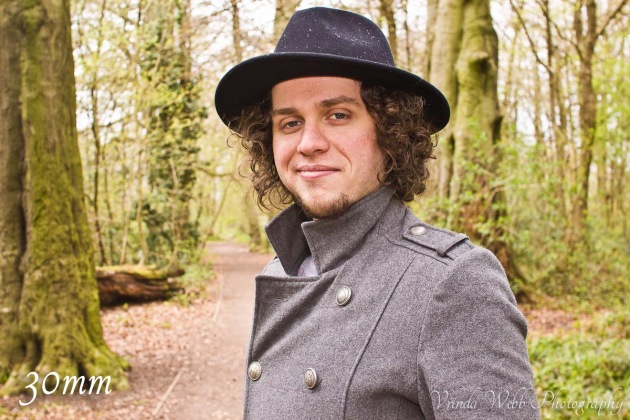
(Photo taken at: 1/320, f/5.6, ISO 800)
Canon 50mm 1.8 (a.k.a. the “nifty fifty“):
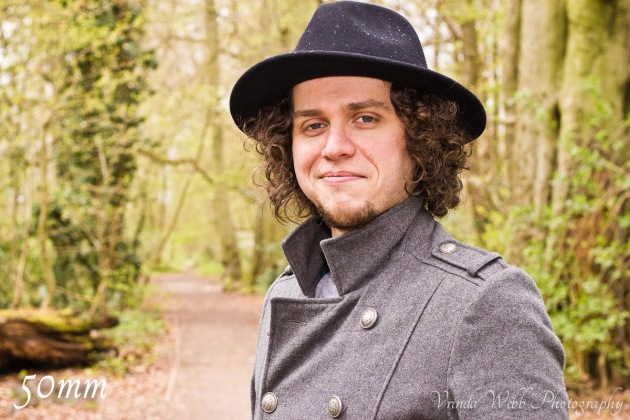
(Photo taken at: 1/320, f/5.6, ISO 800)
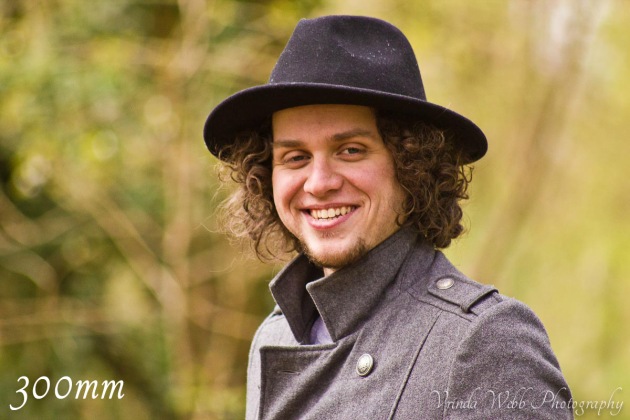
Sigma 70-300mm zoom lens:
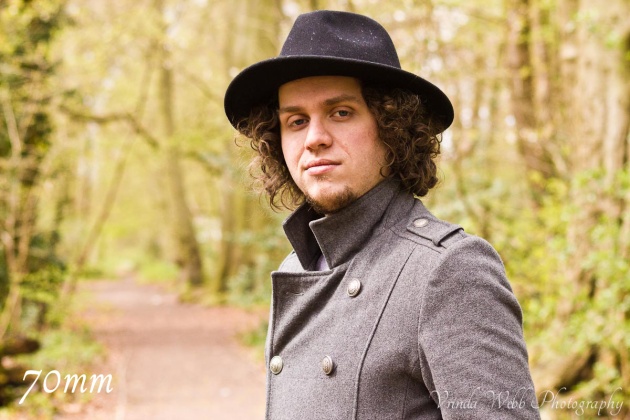
(Photo taken at: 1/500, f/5.6, ISO 800)
Canon 85mm 1.8 :
:
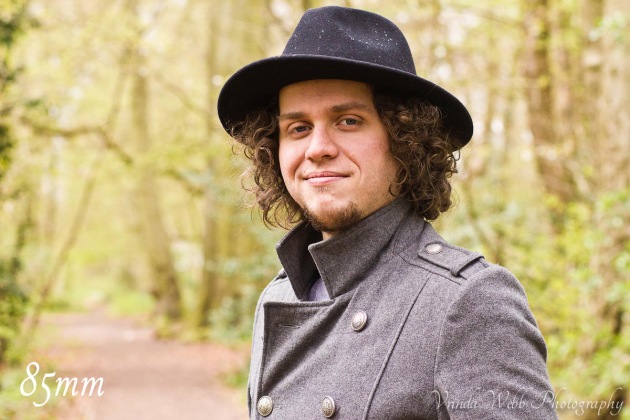
(Photo taken at: 1/320, f/5.6, ISO 800)
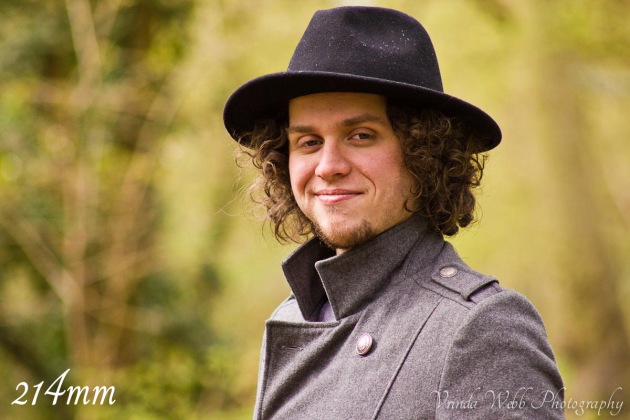
And back to the Sigma 70-300mm zoom for the rest:

(Photo taken at: 1/500, f/5.6, ISO 800)
(Photo taken at: 1/500, f/5.6, ISO 800)
(Photo taken at: 1/320, f/5.6, ISO 800)
And here is the widest photo next to the longest photo for a comparison:
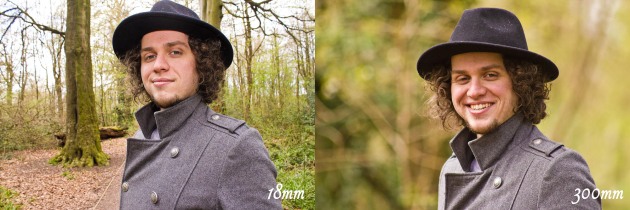
(Photos taken at: 1/320, f/5.6, ISO 800 and: 1/320, f/5.6, ISO 800)
Looking at these it’s easy to see why telephoto lenses are often considered “portrait lenses”. There is less distortion on his face, and the soft background even at f/5.6 makes the subject become the main focus of the image.
But my favourite part of this experiment was finally really understanding what it means when you hear that telephoto lenses “compress” the foreground and background. I’ve understood it in theory but haven’t seen a before/after example in my own photos before.
Let’s look at the side by side again:
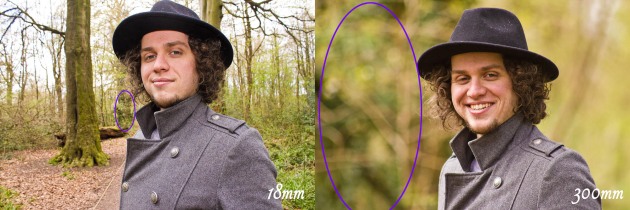
(Photos taken at: 1/320, f/5.6, ISO 800 and: 1/320, f/5.6, ISO 800)
Look at the tree over his shoulder in the first photo, then look at it again in the second photo, it seems to have moved forward about a dozen or so metres, or in other words, it has been compressed! I had no idea quite how dramatic the effect can be, but now that I’m aware of it I will certainly be using this knowledge while planning future shoots.
I’m planning more forays into the world of focal length. In the meantime, what’s your favourite lens or focal length? Which do you not like so much? Email or comment below and let me know!


")